Wednesday, 16 March 2016
What's On Your Workdesk? Wednesday #354
I taught a class this morning, which included those very baskets in a couple of different guises.
One to match an Easter card from the previous session.....
.....and a cheerful polka dot version with teeny tags.
Linking up with Julia and the Deskers on this beautiful sunny afternoon.
Wednesday, 8 April 2015
What’s On Your Workdesk? Wednesday #305
No crafting in progress, for you to have a nosy at, today. It’s been in use all morning for either eating, revision or packing parcels. I’m just back from delivering my boy to a nearby village for an afternoon session of D&D with friends. A much needed break for all of them.
There are a few things on the table though. The box at the back is a parcel waiting for courier pick up. I’ve been “destashing” the stamps and ink pads I no longer use and saving the money towards a dressmaking dummy. The good news is I’ve reached my target and she is on her way as of this morning. I’m very excited.
The rest is what came in the post. A gorgeous postcard from Beverly as part of Liberate your Art, the all important Polling Cards and a second hand copy of Cross Stitch. I can’t wait to get stuck into the latter. I’ve been very much enjoying the recent TV adaptation of these books, now that it’s finally made its way onto streaming. Anyone else an Outlander fan?
Finally, the “little something” that I made for my nieces and nephews this year.
Linking up with Julia for the Wednesday desk hopping extravaganza.
Friday, 18 April 2014
Easter Bunny Lollipop Holders
Most of my nieces and nephews are now past eighteen and we stopped giving the usual chocolate eggs a while ago. I still like to give a little token and have made various different things over the last couple of years. This year it’s bunny lollipops.
To make four of these, you will need a sheet of A4 card and two 1 3/4” squares of a contrasting colour for the holders, plus an assortment of scraps for the bunnies. A selection of circle punches and an oval one. A white pen, a pencil and a crop-a-dile.
Trim the sheet of A4 so that it measures 11” and then cut four 2” strips lengthwise.
Score at 4 1/2”, 5 1/2”, 7 1/2” and 8 1/2”. Shape the ends if you want to, or leave as they are. I’ve used a tag punch, but you could just round the corners or use whatever punches/dies you have on hand. Adapt it to suit whatever you’ve got.
Add the squares of cardstock. You may want to adjust the size of the one on the right to suit the shape of your strip ends. Alternatively you could use a colour for the base that contrasts with your bunnies, then you won’t need the squares. Flip the strip over, punch a hole and add glue to the right hand panel, as shown in the photo.
Fold the holder into shape as shown and adhere the top sections together.
Punch out these shapes. My circles are 1 3/8”, 3/4” and 3/8” but you can use whatever combination you have. There are many punch art bunnies to be found on Pinterest and I didn’t have the exact selection of punches for any of them. Most required two different sized ovals, but I got over that issue and made my own design.
Glue the pink ovals on top of the kraft ones leaving a gap at the top and side. Turn over and trim away the excess pink card. Glue the brown circles on top of the white ones so that a little white shows. Glue the larger white circles onto the head and add the nose. Finish assembling your bunny, then add highlights and whiskers.
Adhere the bunny to the front of the holder, pop in a lolly and you’re done. I made a couple of changes that aren’t shown in the photos. I find these projects tend to evolve as I go along. Firstly I embossed the squares with a Swiss Dots folder before gluing them on and I tied a bow around the lolly stick of the “down eared” bunny.
Happy Easter to you and yours. Have a lovely weekend.
Wednesday, 2 April 2014
What’s On Your Workdesk Wednesday? #252
A mess! This is the result of Hurricane Fiona passing through. Packing up for class this morning, in a big rush.
Mainly leftovers of the projects from the last couple of classes I’ve done. I bring all the card/paper scraps home with me, so that I can put them in our recycling bin, rather than the mixed rubbish bin available to me at the venue. Obviously they didn’t make it to the bin last time and I emptied the container onto my desk ready to refill.
Moving swiftly on….
….here’s what we made today. A flower garland card and matching gift box*. Just in time for Easter, but equally useful for a Spring birthday.
Keeping it short today. Those boxes need unpacking again and my little cherubs will be bursting through the front door at any moment. Join the fun at Julia’s place.
*If you fancy making a gift box like this one, there’s a tutorial here.
Friday, 15 March 2013
Friday Finds ~ Easter Bunnies
Last week it was felt chicks, this week I have little knitted rabbits for you.
Rebecca Danger has a selection of free patterns (including the rabbits) available on her blog and even more to choose from in her Etsy shop. If knitting is your thing, then why not check her out. Have a lovely weekend.
Friday, 8 March 2013
Friday Finds ~ Easter Chicks
I found these cute little felt chicks, put together with a simple blanket stitch.
There is a printable PDF pattern available with photographs and clear instructions. Even if sewing is not your thing, it’s still worth clicking through to Myrtle & Eunice, just to see the chicks (with added legs) re-enacting Riverdance, Michael Jackson’s Thriller and the Can Can. So funny.
Friday, 6 April 2012
Easter Treat Holder Tutorial
I saw these carrots on the Bo Bunny blog and mentioned I was making some for my nieces and nephews. A couple of people asked how to make them. I must admit I had assumed there were instructions, if you followed the link in my previous post, but it would seem there are not.

Rather than doing my usual FTILTF, I’ve put together a tutorial on how I made mine. DST = Double Sided Tape
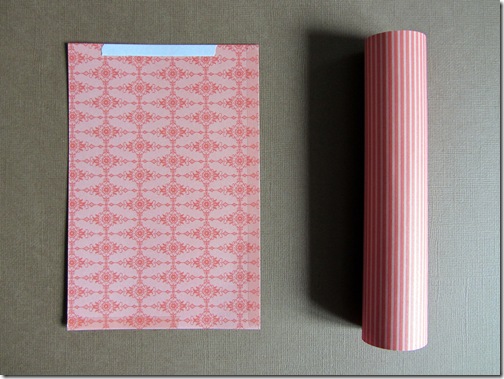
Take a sheet of orange scrapbook paper and cut a piece measuring 6” x 4”. I have seen various measurements for the ‘sour cream containers’, but this meant I could get six treat holders from one 12” x 12” sheet. Turn it to the wrong side and apply DST down the long side and top and bottom edges, as shown in the photo.
Remove the backing from the tape on the long side and the bottom edge. Carefully roll the paper into a tube.
Seal the bottom of the tube together (the seam running from top to bottom is on the left side underneath) and put your treats inside. Turn the tube (as in the centre of the picture) remove tape backing and seal the top. Snip off the corners on both ends.
Cut a piece of green paper to measure 6” x 2” and fold in half, matching the short edges. Cut the paper to make a fringe, leaving about 1/2” uncut at the folded edge. Curl the paper over your fingers and then fold the long sides over each other.
Staple the carrot top onto the back of your carrot, with the seam in the middle. Punch a scalloped circle from coloured paper and a circle from white card. Glue them together and attach to the front, using a couple of foam pads. This will cover the rough side of the staple.
I used caramel bunnies inside my carrots, but you could use mini eggs or jelly beans. I’ll be personalising them with my niece’s and nephew’s initial letters. All ten of them have a different letter, which is handy.
The carrots on the Bo Bunny blog have had the tops crinkled with a paper crimper, but I don’t have one, so I’ve just left them as they are. If I was making them for very young children I think I would avoid using the staples altogether. Instead I’d put extra strong red backed DST all the way across the top edge and sandwich the carrot top inside when I sealed it.
I hope that all makes sense. Any questions just ask and I’ll do my best to answer. Apologies for the dark photos. It’s a very dull day here and I’m banished to the kitchen, while the lounge walls are being painted blue. Hooray!
Have a lovely Easter weekend.
Friday, 30 March 2012
Five Things I’m Loving This Friday ~ Spring
After a little break from the Friday lists, I’m back with some Spring themed projects.
Bunny finger puppets from The Purl Bee.
Chicken juggling bags from pom pom emporium.
Linen bunnies from EAB designs.
Subway art painted Easter eggs from Lil’ Luna.
A bunny fold napkin.
I found the last one on Pinterest and sadly the link leads nowhere. However, with a bit of googling, I found some instructions here and have since discovered the photo is from Martha Stewart.
I decided to go back to using photos in my Friday Five, but I’m hoping that anyone wanting to pin any of these ideas will click through the links first. Thankyou.


