Friday 31 August 2012

Friday Find…..Of A Different Kind ~ Part 2

Continuing with my shots for Rinda’s Summertime Photo Scavenger Hunt.

P1020301

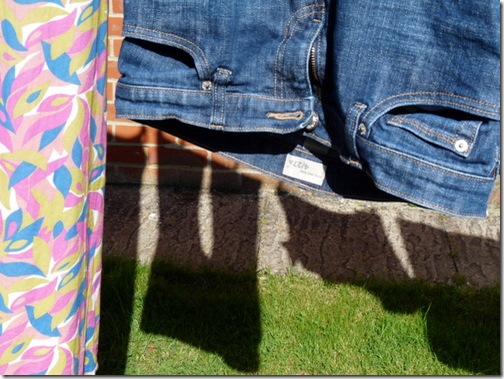
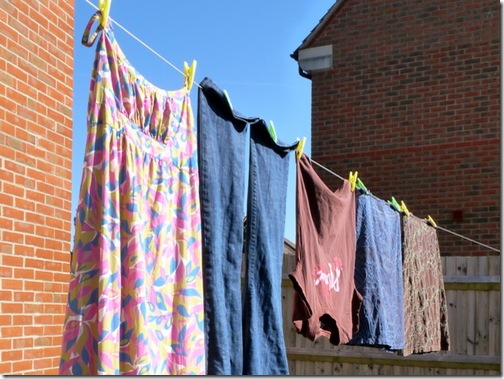
Given the chance I love to hang my washing out on the line, but the opportunities for that have been few and far between this Summer. I like the contrast of the red brick and the blue sky. So much so, I seem to have focussed on the wall not the clothes!

P1020303

I also took the opportunity to capture a shadow shot, while the sun was out, although it probably won’t be my final entry. There’s still time. I’m hoping for an Indian summer so that I get a chance to wear my lovely new maxi dress, seen hanging here.

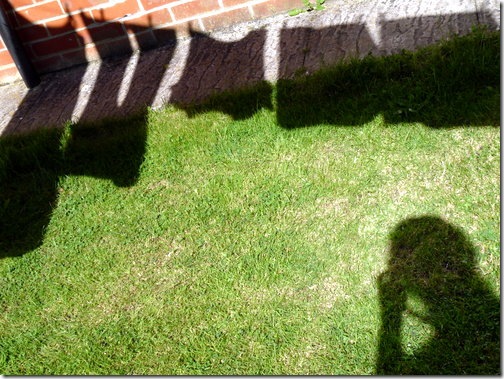
P1020306

I seem to have snuck into this one.

That’s it for now. I’ll share a few more shots over the next two Fridays and my final run down on the 21st September. It will be back to my usual kind of finds after that.

Tomorrow is Stampin’ Up Saturday around here and then it’s over to Sian’s place for Storytelling Sunday. Enjoy your weekend.

Thursday 30 August 2012

Simple Gift Card Tutorial

The card itself may be very simple, but photographing the stages and putting it into words…..not so much!
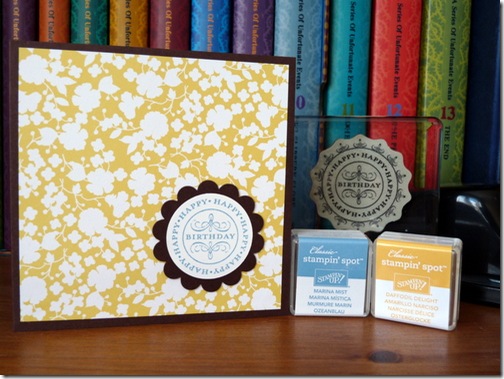
P1020298
I needed something to present a gift card in and a birthday card in a hurry recently. This little project was born out of that necessity, as it serves both purposes. There are many beautiful examples of gift card holders to be found around the web, but they all seemed overly complicated to construct. I wanted something very quick.
I watched this video tutorial on Jennifer McGuire’s blog and that was my starting point. It was fairly close to what I had in my head and with a few changes I made it work for me. Not everyone is a scrapbooker (No! Really?) and won’t necessarily have 12” x 12” paper to hand and my modified design can be made with A4 card.
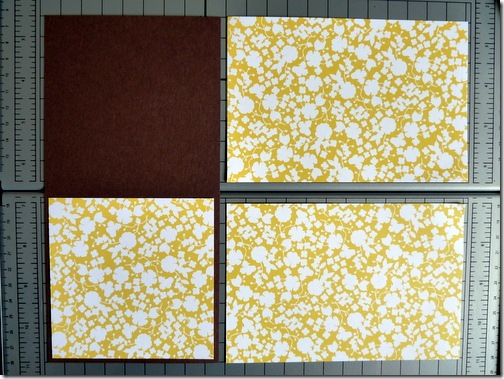
P1020290
You will need:
  • One piece of 8 1/2” x 4 1/4 card
  • Two pieces of 6” x 4” heavy weight patterned paper or light card
  • One piece of 4” x 4” heavy weight patterned paper or light card
P1020293
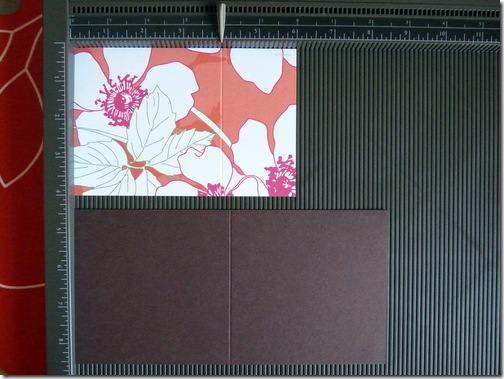
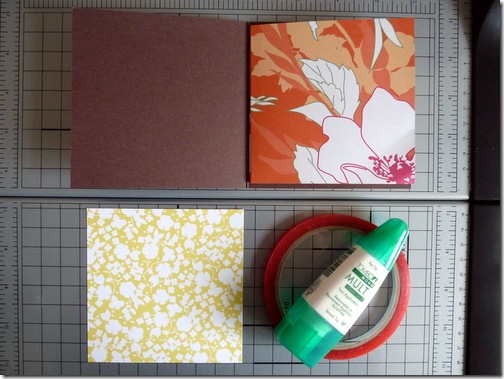
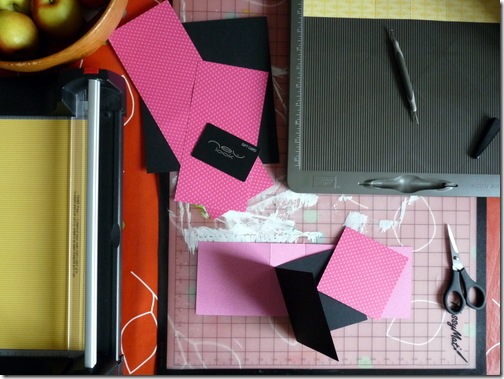
Score the two larger pieces of patterned paper at 4” and the card at 4 1/4”. My paper is double sided but it doesn’t need to be. I’m scoring on the reverse, because I prefer to fold away from the ‘valley’. I think it gives a cleaner look.
P1020292
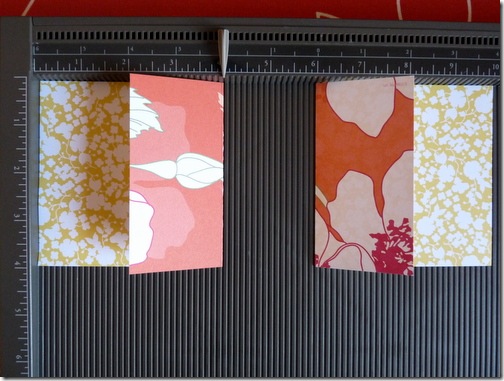
Fold both pieces as shown. The sections with the larger pattern on are the two you will be gluing together, to form the pocket for your gift card.
P1020294
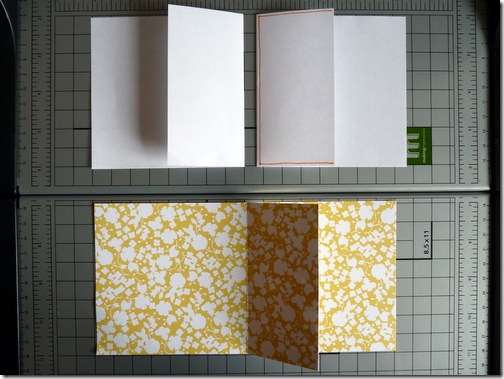
Put a line of glue around the edge of your patterned paper (as shown by the orange line on the copy paper) and press together firmly. You could use double sided tape here. The width of my tape meant it would be a very tight squeeze to get the card in and I prefer the ‘wriggle room’ that using wet glue gives me.
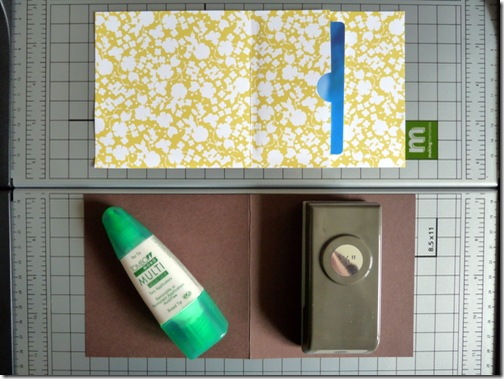
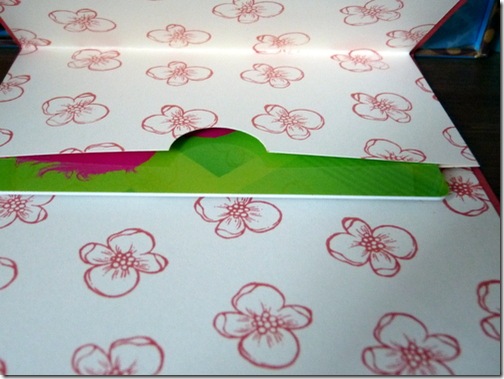
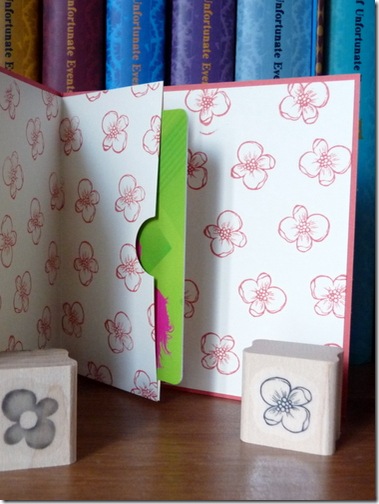
P1020295To make it easier to get the card back out, I cut a half circle from the top edge of my pocket, using a 3/4” circle punch.
P1020296
Glue the finished pocket piece inside the back of the card, just to the right of the fold. Next put some glue on the front of the paper section and close the card to stick it down. Add the 4 x 4” paper to the front and decorate as you like.

A few observations:
  • It takes around eight times as long to put together a tutorial on making a gift card holder as it does to make a gift card holder.
  • I prefer to work in inches on paper crafting projects, although I was taught in metric throughout my entire school life.
  • Card comes in A4 size in the UK, which is different to the US 8 1/2” x 11” format, but not by much.*
  • If I can alter a project to avoid the use of a craft knife, I will.
* By cutting a 4” strip across the width of A4, you’ll end up with a finished card that is not quite square. I don’t mind this as it’s less wasteful and I just trim 1/8” from one side of the 4 x 4” piece of paper, to make the borders equal on the front.
With any luck this will all make sense, but if you have any questions just shout.

Wednesday 29 August 2012

What’s on Your Workdesk Wednesday #169

…..or tales from the kitchen table.

P1020287

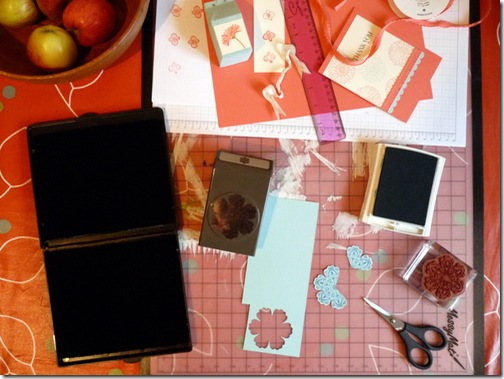
A bit of early morning crafting going on here. I grabbed the opportunity before there were children wanting to eat breakfast. Pushed to the back, the remains of last night’s ‘kitting’ session. At the front, the beginnings of a birthday card, featuring my favourite way to make butterflies right now.

My next job is to photograph the stages of putting together a simple gift card holder, but the light is very poor here at the moment. The tutorial should be up tomorrow for those lovely people that wanted to know how I made it. I’m off to Julia’s place first though, to browse a few desks while I drink my tea. See you there.

Saturday 25 August 2012

Stampin’ Up Saturday ~ Reason to Smile #3

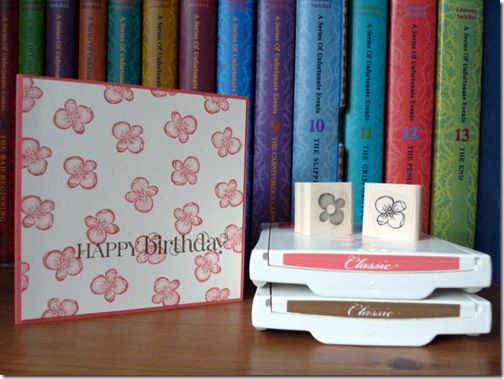
I’m back after my little break and I’ve a simple gift card holder for you this week using the smallest stamps in the Reason to Smile set.

P1020281

You may remember that I mentioned this is a 2-Step stamp set. The stamps are intended to be used in pairs, which I haven’t shown up until now as the designs work so well individually. I randomly stamped the solid in Calypso Coral and then stamped the outline over the top in the same colour.

P1020284

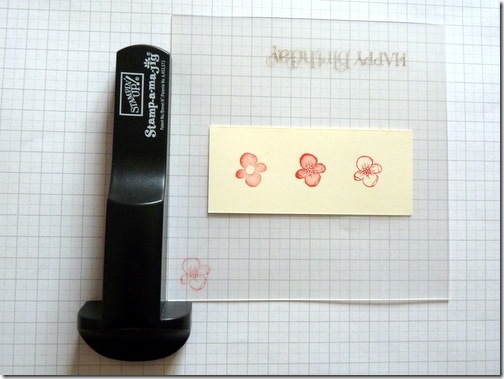
You can do this by eye, for an arty look, or to line them all up more accurately then the Stamp-a-ma-jig comes in very handy. Stamp the outline onto the clear sheet and put that over your already stamped solid. Put the tool in place, slide in your stamp block and hey presto, the two images are perfectly aligned.

P1020282

I randomly stamped the inside with the outline stamp and used the Stamp-a-ma-jig to place a sentiment in Soft Suede on the front. You could of course use patterned paper for a much quicker result. There’s a flap to hold the giftcard safely in place and it’s very easy to put together. I’ll do a tutorial next week, if anyone is interested.

P1020280

Details of all the products I’ve used and the special offer bundle can be found here and as always you can contact me on angelfishcrafts{at}gmail{dot}com.

Don’t forget if there is anything you fancy from the Summer Mini, then you only have until the end of this month to order. Some items will carry over into the new catalogue, due out on the 1st October, but some, including that lovely pleated ribbon, will be gone for good

Next week I can start showing you all the lovely new ‘seasonal’ goodies that will be available from September 1st. I’m not sure I dare say the ‘C’ word just yet!

Friday 24 August 2012

Friday Find…..

…..of a different kind.

P1020256

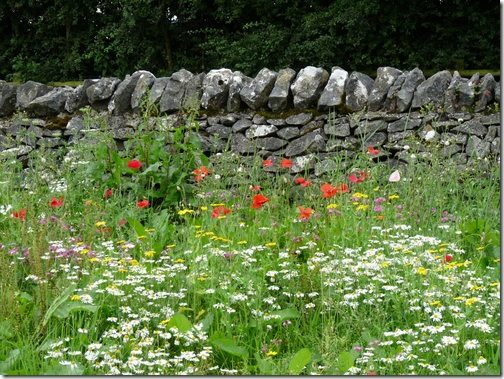
We spent a lovely, if rather damp, week in Derbyshire and this was what marked the boundary of our campsite. A beautiful BORDER of dry stone walls and wild flowers.

P1020267

We arrived home on the Monday afternoon and I had to get up early on Tuesday morning to catch this TRAIN. It took me to Exmouth to see two gorgeous girls, that I was lucky enough to share my college years with. Happy days.

As you may already have worked out these shots are brought to you courtesy of the lovely Rinda’s Summertime Photography Scavenger Hunt 2012.

I’ll be back tomorrow with Stampin’ Up Saturday. Hope to see you there.

Wednesday 22 August 2012

What’s On Your Workdesk Wednesday? #168

It’s been a couple of weeks since I joined in with the desk hopping madness. The Mechanic has some time off work and I’ve had a little break from blogging in general. We had a wonderful week in Derbyshire, despite the terrible weather and are now home again and helping The Inlaws to downsize to a bungalow.

P1020277

I needed a couple of gift card holders come birthday cards for my niece and a friend’s daughter. The makings of those can be seen on my kitchen table today.

Head on over to Julia’s place for the low down on why I’m sharing my desk today.

Saturday 11 August 2012

Stampin’ Up Saturday ~ Reason to Smile #2

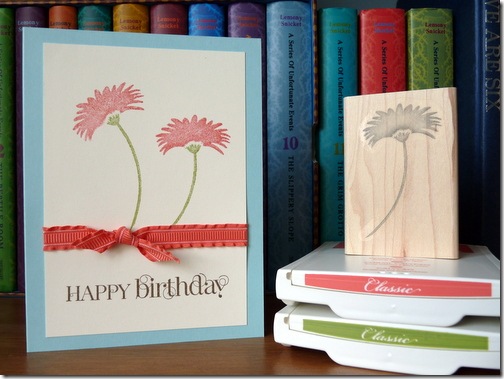
I’ve got a very quick and simple card to share with you this week, using the Reason to Smile set. I hope I’m not boring you to death with this colour scheme, but I love it.
P1020163

This stamp is designed to work with the one I used for the focal image on the mini milk carton last week. The idea being that you stamp the colours using this one and add the outline over the top. Also known as Two-Step Stampin’.
P1020161

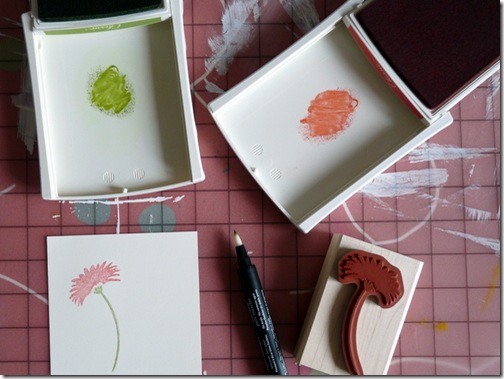
I was after more of a water colour effect for this card, so I just used the solid stamp. By squeezing the case gently before opening, ink is transferred into the lid. This can then be picked up with a blender pen and used to colour the rubber.

Add a sentiment and some pretty ruffled ribbon and you’re good to go. Simple.

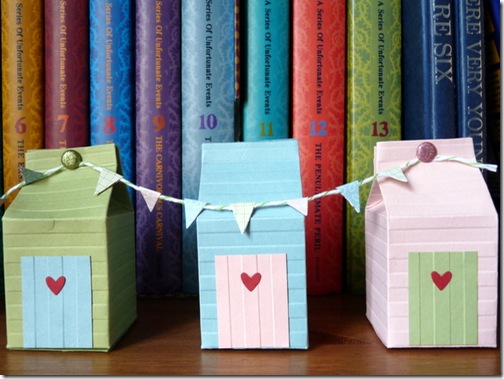
Moving on to beach huts. A couple of folk asked for a tutorial to make these….
P1020141

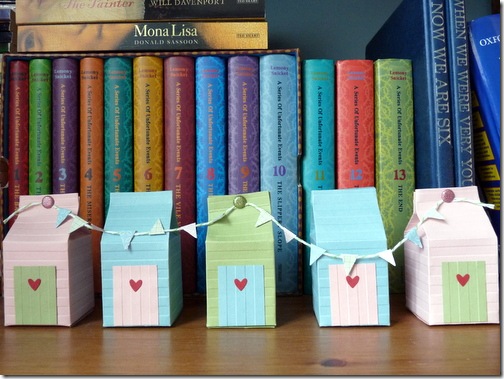
I used the Mini Milk Carton die from SU to make the base of mine, but it is possible to construct a milk carton yourself by cutting and scoring a piece of cardstock. There is a great tutorial by Beate Johns here if you’d like to have a go. Mine is smaller with the ‘wall’ panels being 4 x 5 cm, the roof 4 x 3 and the base 4 x 4cm.

To get the plank effect I ran the cut and scored card through my Big Shot with the Stripes embossing folder. I did that twice to cover the roof and walls, no need to worry about the base. If you don’t have that embossing folder, a scoring tool and ruler would give you a similar result.

I cut a door, 2.5 x 3.5cm, in a contrasting colour and embossed the ‘planks’ in the other direction. The little heart came from the Owl Builder punch and adds a nice finishing touch. I made the mini bunting by using just the tip of the Pennant Builder to punch the shapes and strung them on baker’s twine.
P1020111

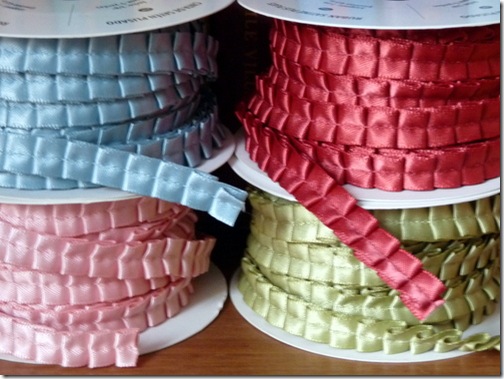
The beach hut colours are Pear Pizazz, Baja Breeze and Blushing Bride.The pink and green will be retiring soon, as will these lovely pleated ribbons. They are only available until the end of this month, so if you’d like some it’s your last chance to get hold of them. It’s £5.95 for 1 metre of each colour including UK P+P.

For all the details of the products I used for the birthday card, see last weeks Reason to Smile post and don’t forget the special offer, which is still available. As always you can contact me at angelfishcrafts{at}gmail{dot}com

I’m taking a short blogging break, so there won’t be a Stampin’ Up Saturday next week and I’ll probably be incommunicado between the 13th and 20th. If I don’t answer your email, I’m not being rude, just have no wifi access!

Hoping the sun will shine on us and you next week, wherever you are in the world.
Friday 10 August 2012

Ten on the 10th ~ Favourite Friday Finds

Blogging seems to have fallen by the wayside this week and I haven’t discovered even one lovely thing for this weeks Friday Find. So a bit of a cheat from me! I’ll give you a run down of some of my favourites from the last year or so.

A heart garland form Betz White.

A linen bunny from EAB Designs.

Brown paper packages from A Creative Mint.

Little knitted animals from Petite Purls.

A fabric portfolio and notebook holder from The Cottage Home.

A pretty iPhone pouch from Made During Quiet Time.

A friendship bracelet kit from Tatertots and Jello.

A simple baby quilt from the Moda Bakeshop.

A locker key fob from Fiskars Crafts.

I’ll finish up with one you might not have seen before, as it was part of a guest post I did for Sian at From High in the Sky. A travel embroidery case from Sew Sweetness.

I had forgotten a few of these and was glad of the reminder. It was fun having a little browse through the archives and surprising to find that I have been blogging this long!

There will be lots more lists of ten to see over at Shimelle’s place today.

ETA: Ah, Shimelle’s post is not up yet, but I know she is busy with super secret Olympic stuff. I’m going to post mine anyway as it’s getting late in the day.

The Mechanic has a fortnight off from this weekend, so I’ll be taking a blogging break. Before I do though, I’ll have a simple card for Stampin’ Up Saturday tomorrow.

Sunday 5 August 2012

Storytelling Sunday ~ Lazy Days of Summer

From the days when summers seemed endless and the sun always shone.

SCN_0072

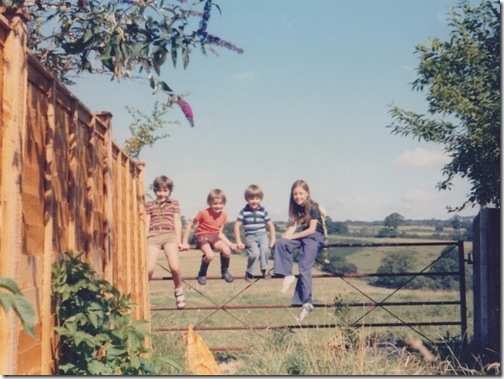
When we got up in the morning, met the other children in our little close and spent the day in the fields behind our homes. Only returning when we got hungry.

SCN_0073

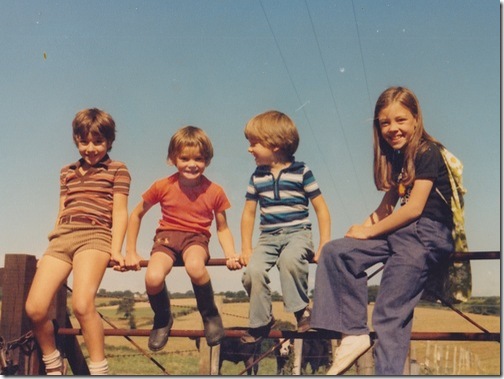
These photos triggered a whole host of memories from childhood summers. The boy on the left was literally the boy next door, next to him is my younger brother, then the boy who lived ‘up the top’ and lastly my nine year old self. Look at those flares! Well it was the seventies.

On my back I’m carrying a rucksac of sorts, that I made from a curtain remnant my Gran gave me. Inside was an exercise book filled with the cards that came free in boxes of tea, depicting wild flowers and birds. There would have been I-Spy books too (remember those?) and a container to collect wild flowers in, for pressing later.

I could go on…..and on. Happy days.

More Lovin’ Summer than Summer Lovin’, which is Sian’s theme for Storytelling Sunday this month. There will be plenty mores tales to read over there. Why not pop in and maybe share one of your own.

Saturday 4 August 2012

Stampin’ Up Saturday ~ Reason to Smile

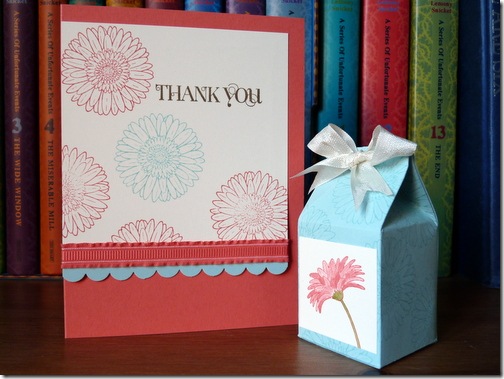
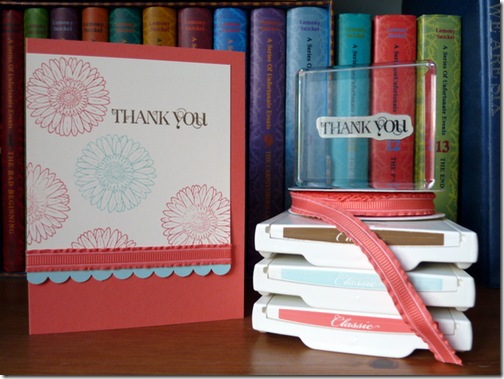
Today I’ve used a set of stamps, that is only available during the month of August, to make a pretty ‘Thankyou’ card and treat holder.

P1020155

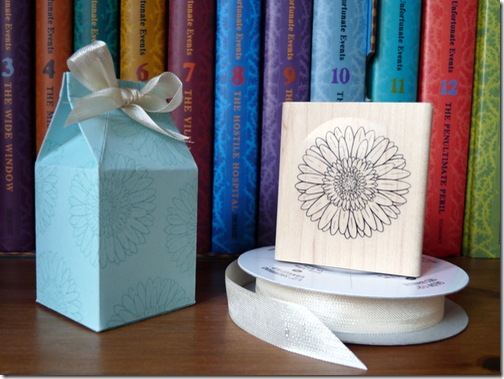
Sticking with last week’s colour scheme, I stamped one of the flowers in Pool Party to decorate this mini milk carton. The seam binding makes the perfect fastening.

P1020147

Then I added Calypso Coral for the card and a sentiment in Soft Suede. Finishing off with a scalloped border and some lovely ruffled ribbon.

P1020148

I stamped the image for the carton in Calypso Coral, then picked up some of the ink, using a blender pen, to colour it in. Adding Lucky Limeade for the stem.

P1020153

I’ve used just two of the seven stamps included in this set. It’s available in wood mount at £18.95 or Clear mount at £14.95. Even better, if you place an order for £60 you can get it absolutely free.

Paired with a sentiment set, it can be used to make a wide variety of cards. With this in mind, I’ve put together another bundle for you.

  • Curly Cute sentiment stamp set in wood mount ~ £20.95
  • Scallop Edge Border punch ~ £14.25
  • Calypso Coral inkpad ~ £4.95
  • Pool Party inkpad ~ £4.95
  • Soft Suede inkpad ~ £4.95
  • Lucky Limeade inkpad ~ £4.95
  • Multi purpose Liquid Glue ~ £3.25
  • Blender Pen ~ £2.65
  • Reason to Smile wood mount set ~ FREE (worth £18.95)

I will also give you a pre cut kit to make two each of the card and treat holder, including the ribbons. You’ll have everything you need to get started right away. All this for £60 (plus £4.95 P+P) which is excellent value and a great starter kit.

If you’re a seasoned stamper and already have your own acrylic blocks, then you might prefer to have both stamp sets in the clear mount version. In which case you can choose an extra inkpad colour. The scallop border could also be swapped for any other punch worth £14.25. They can be found in the catalogue on p.116-118

If you’d like to order this bundle, get a catalogue, or ask a question about anything I’ve featured today then you can contact me at angelfishcrafts{at}gmail{dot}com

PS I used the Mini Milk Carton die to make my treat holders and the beach huts I showed earlier in the week. It is possible to make one by cutting and scoring a piece of card. I’m putting together a tutorial and will share it next week.

Summertime Photography Scavenger Hunt 2012

Rinda is hosting a link up party for those participating in her fantastic scavenger hunt. I wasn’t going to take part today, but having popped in to see what others have captured so far, I changed my mind!

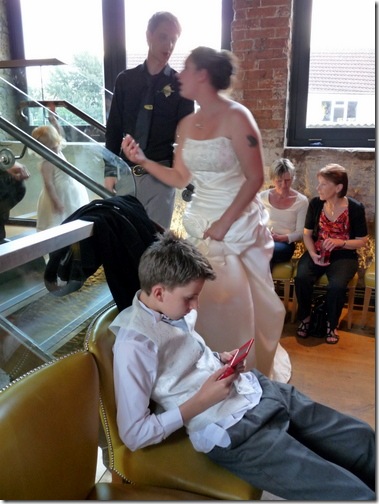
As soon as I saw Rinda’s list for this year, I knew I wanted to join in. I’ve been saving it for the summer holidays, so that we can all have the fun of searching. I did take one photo in advance though, as I wasn’t sure I’d get another glimpse of a bride.

P1020023

This was captured as the evening do was beginning and guests were moving from the restaurant below into the rooms above. It was raining and the bride was very animated, so this was the best of the bunch. Blur aside, I like the fact that it captures a few other details of the evening.

One down, twenty to go. It’s not to late to join in. Go check it out.

I’ll be back this evening with my usual Stampin’ Up Saturday post.

Friday 3 August 2012

Friday Find ~ Happy Drawing

I’m very lucky that both my children love drawing. If the weather is poor during the school holiday, I can get out the paper and pencils and know they will be happy.

This 1970 book by Ed Emberley is brilliant for children (and adults) even if they think they can’t draw. I remember it from my childhood and it is still in print 40 years on.

Imagine my excitement when I discovered that there is now a line from Cloud 9 Fabrics, called Happy Drawing, featuring Ed’s designs. I *may* have clapped!

If you have children to entertain over the next few weeks, you might be interested in Mark Kistler’s Online Video Art Academy. There are quite a few free lessons to choose from and you can also find him on youtube.

Just before I go, I want to give Clair a shout out. She is running a free class over at Obstinate Pursuit, for anyone who would like to have a go at sewing on their scrapbook pages or cards. Be sure to check it out.

I’ll be back tomorrow with Stampin’ Up Saturday. Like today, my post probably won’t appear until the evening. Note to self: schedule posts for the summer holidays.

Wednesday 1 August 2012

What’s On Your Workdesk Wednesday? #165

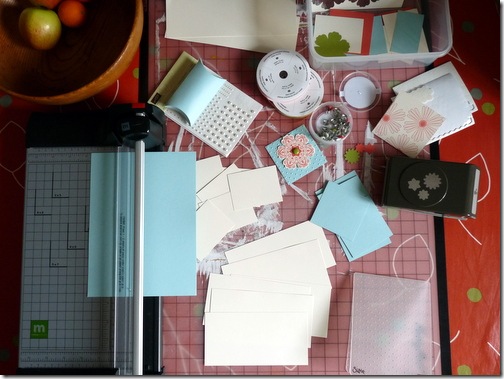
I’m home alone this afternoon, which is a rare occurrence during the summer holidays. I’ve made use of the time to cut and emboss a bunch of card kits.

P1020138

There’s a bit of a production line going on. The cards that they make can be seen here, if you’re interested.

P1020139

I made these little beach huts, complete with mini bunting, a few weeks ago and forgot to share them. Can you spot the deliberate silly mistake? I stuck the doors on before folding and the roof faces the wrong way! Ah well, you live and learn.

To see what everyone else has going on in their workspace today, head on over to Julia’s place and all will be made clear.