Wednesday 28 November 2012

What’s On Your Workdesk Wednesday #182

Neither the kitchen table or the ironing board today. Not enough room on either so I’m spread out across the lounge floor instead. Well not me, the fabric, obviously.

P1020462

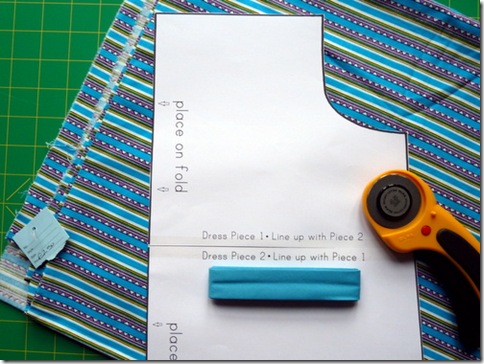
I’ve been searching local charity shops for pillowcases, for a while, with no joy. Yesterday I found this 2 yard length of cotton fabric for £2.50, which will be perfect to make a couple of pillowcase dresses for Dress a Girl Around the World.

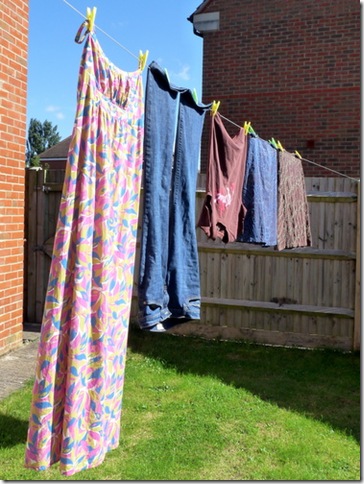
The pattern is printed out and the fabric is on the line. If rain doesn’t stop play, then I’ll be cutting the dresses out later.

For more desks and maybe a couple of floors head on over to Julia’s place.

Saturday 24 November 2012

Stampin’ Up Saturday ~ Morning Post

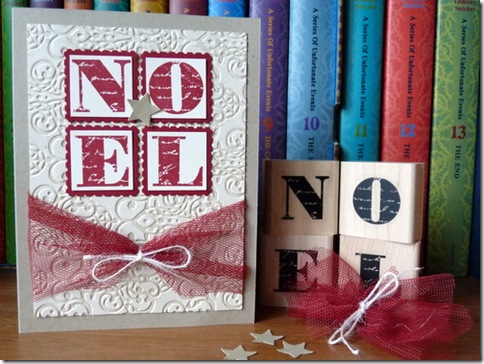
I love alphabet stamps for making titles on scrapbook pages and they can be used to great effect on cards as well. Not just for personalising them, although I often do that for baby cards and special birthdays, but as the focal point of the design.

P1020459

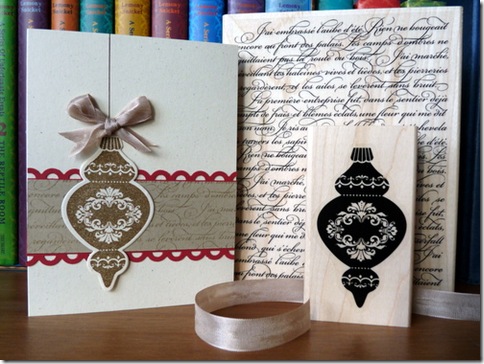
These colours have become my go to combination for this year’s Christmas cards. Kraft and ivory with varying amounts of red and sometimes, as here, a touch of gold.

P1020443

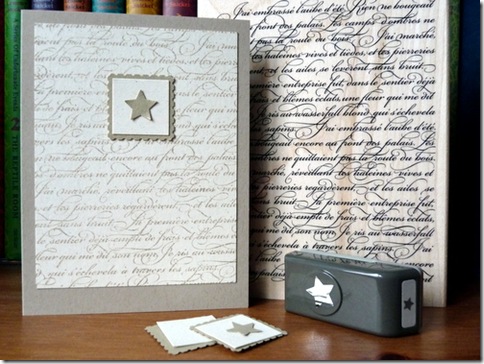
Still using the postage stamp punch, I’ve made another which is much quicker to mass produce. That script stamp comes in handy for so many different occasions.

For both cards:

  • Crumb Cake cardstock and ink
  • Ivory Naturals cardstock
  • Brushed Gold cardstock
  • Postage Stamp punch
  • 1” Square punch
  • Merry Minis (star) punch

With the addition of:

  • Cherry Cobbler cardstock and ink
  • Morning Post alphabet stamps
  • Lacy Brocade embossing folder
  • Cherry Cobbler tulle
  • Twine

for the first card and:

  • En Francais background stamp

for the second.

I am loving the new Scalloped Tulle Ribbon. Along with the brushed gold cardstock, it lifts a fairly simple card and turns it into something much more luxurious. A little goes a long way. You can find it on p.4 of the Autumn/Winter catalogue.

As ever you can find me here angelfishcrafts{at}gmail{dot}com if you have any questions, or leave one in the comments and I’ll get back to you, as long as you’re not a ‘no-reply’ blogger. I’ll be ordering again next week if anyone needs anything.

Have a great weekend. I’ll be back on Tuesday with more on the Flower Garden block. It’s progressing nicely.

PS If you’re wondering why Crumb Cake ink is listed for the ‘Noel’ card (although you probably aren’t!) I used it to ink the folder before embossing the cardstock. It doesn’t really show up in the photo, but gives the background more definition.

Wednesday 21 November 2012

What’s On Your Workdesk Wednesday? #181

I’m taking a leaf out of Jaki’s book today and keeping it short and sweet.

P1020449

Christmas card production is stepping up around here and I was feeling fairly smug, until I read Julia’s blog. Head over there to see more desks and many more words.

OK that’s it from me. See you Friday!

Tuesday 20 November 2012

The ‘Love What You Wear’ Project ~ I’m in!

In a change to the scheduled Flower Garden block post, I’d like to talk about something else this Tuesday. Something new that I’ve signed up to this month.

P1020302

The ‘Love What Your Wear’ Project is the brainchild of Morwhenna Woolcock, a Bristol based artist, designer and maker. She has pledged not to buy any new clothes (apart from shoes and underwear) for a whole year, from 1st November 2012 until 1st November 2013. I’ve decided to join her, along with 20 odd others….so far.

It doesn’t mean that we can’t add any new clothes to our wardrobes during that time, just that they cannot be bought brand new from a shop. They can be thrifted from charity shops and jumble sales, bought pre-loved from dress agencies or ebay, swapped with friends, or even sewn for ourselves.

I’ve made my own clothes before and quite a few dresses for my daughter, when she was younger, as well as all the usual fancy dress that is required at school for performances and book days. I haven’t made an actual item of clothing for myself, from scratch, since I sewed my wedding outfit. That was a while ago now.

I discovered the project on Twitter. I’m a recent convert. I joined a couple of years ago, but didn’t really ‘get it’ and I’m not saying I totally do now, but I love it! I was already following Jen from My Make Do and Mend Year and Louise who co-ordinates Dress a Girl Around the World in the UK, that’s how I found Morwhenna.

I’m so looking forward to what this year will bring. I hope to rediscover and brush up on my dress making skills, meet like minded folk and have fun along the way. My first project is to make an A line skirt like the blue one (second from the end on the washing line) that I love and am gradually wearing to death. I’ll keep you posted.

Saturday 17 November 2012

Stampin’ Up Saturday ~ Merry Minis

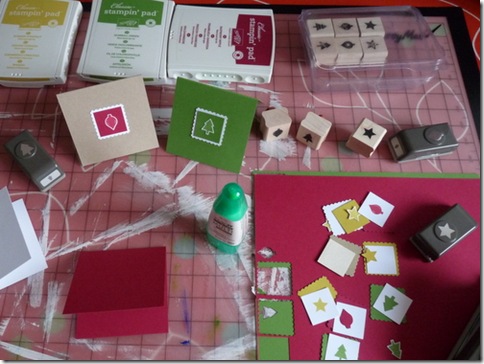
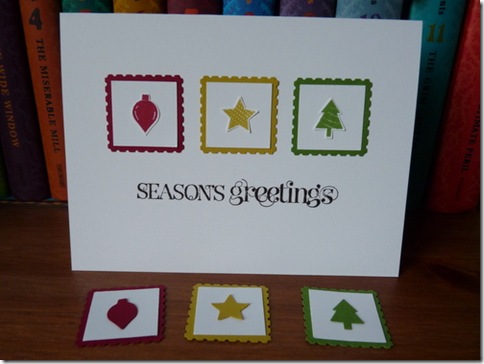
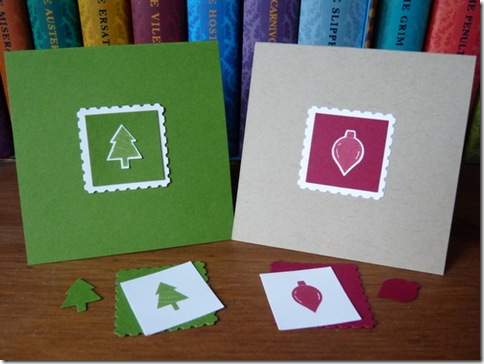
As soon as I saw these tiny stamps in the catalogue, I knew they would be perfect for clean and simple Christmas cards. Matching punches were the icing on the cake.

P1020448

Once you have all the pieces stamped and punched, it only takes a few minutes to assemble the finished card. You can even leave out the stamping stage and add the shapes punched from coloured card instead, to speed things along.

P1020446

For these mini cards I reversed the colours so that the edge was white and mounted on coloured card and kraft. They would make good gift tags too. Very quick to do.

  • Merry Minis stamps
  • Merry Minis punch pack
  • Raspberry Ripple ink and cardstock
  • Gumball Green ink and cardstock
  • Summer Star fruit ink and cardstock
  • Whisper White cardstock
  • Crumb Cake cardstock
  • Curly Cute sentiment stamps
  • Early Espresso ink

If you would like more information on any of the products then the online catalogue can be found here and you can contact me at angelfishcrafts {at} gmail {dot} com Apologies for the awful photos, it’s so dark here today. I’m looking forward to a cosy card making session at the kitchen table. How about you?

Friday 16 November 2012

Friday Find ~ Advent Garland

If you’re looking for an advent calendar that also makes a cute decoration, then this could be the one.

It’s easy to make with only a small number of readily available supplies. Perfect when time is short. The instructions can be found at Bugs and Fishes along with templates for all the shapes. The designs would also be great for simple Christmas cards to make with your children to give to their friends.

Laura has lots of great tutorials and if you’re a fan of felt, you’ve probably already come across her blog. If not, then go check her out. What are you waiting for?

I’ll be back tomorrow with a Christmas card design of my own.

Wednesday 14 November 2012

What’s On Your Workdesk Wednesday? #180

Back to the kitchen table this week.

P1020441

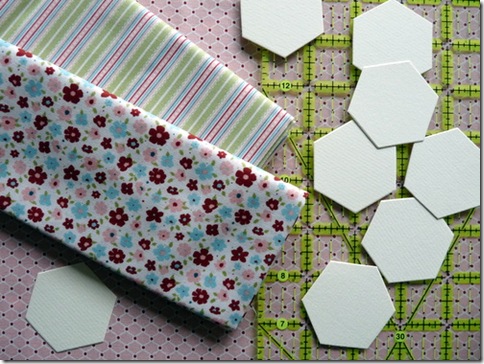
I’m cutting more pink strips for hexies. I started with this colour for the centre of the flower and then used the small floral print as the ‘petals’. The green stripe around that and now I need another round of the pink. You can see the other fabrics here.

I have a feeling that stitching these is going to be addictive. It’s the ideal thing to keep my hands busy, while I watch TV in the evening, or sit next to my husband while he snores in front of it!

Head on over to Julia’s place to see who else is taking part today.

Tuesday 13 November 2012

Teal Flower Garden Block ~ Trial Run

I picked out some fabrics for my first attempt at a Grandmother’s Flower Garden block and cut a whole bunch of foundation papers ready to go.

P1020439

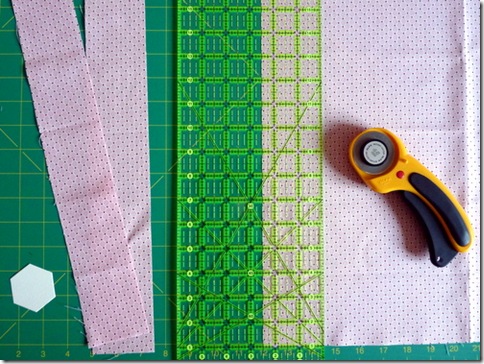
Having the die was a blessing. I cranked it through the Big Shot with five layers of thin card, which gave me twenty hexagons. Plenty for the first block. I ironed the fabrics and cut some 2 1/2” strips with my rotary cutter. Then cut across to make squares. I followed this tutorial to baste the fabric onto the paper.

The next step is to whip stitch the pieces together. If all goes well with this one, I’ll make another for the Team Teal Quilting Bee. I think this one will end up as the centre of a cushion for my daughter’s bedroom. I know she has her eye on it.

Anyone else having a go? It’s not too late. You can find my preparation post here, if you missed it.

Saturday 10 November 2012

Stampin’ Up Saturday ~ Ornament Keepsakes #2

This is one of the cards we made in class on Wednesday. Another simple design, that can be mass produced fairly quickly, like the one I showed you last week.

P1020437

I went for a neutral colour scheme this time and added a splash of festive red with some punched border strips. I think it has a nice vintage feel to it .

  • Ornament Keepsakes stamps
  • Holiday Ornaments framelits
  • Naturals Ivory cardstock
  • Crumb Cake cardstock
  • Riding Hood Red cardstock
  • Crumb Cake ink
  • Soft Suede ink
  • Crumb Cake seam binding

There is a great offer on these stamps throughout November, which you can find here. I can be found at angelfishcrafts{at}gmail{dot}com if you’d like to place an order, request a catalogue, or have any questions on the products.

I’ll be back on Tuesday with my hexie progress. Have a lovely weekend.

Wednesday 7 November 2012

What’s On Your Workdesk Wednesday #179

I taught another class this morning and I figured you probably wouldn’t want to see my kitchen table all piled up with supplies for a third time, so I’ll show you my ironing board instead.

P1020434

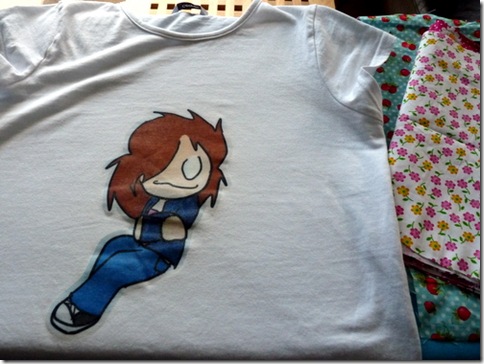
Remember that transfer paper we were going to experiment with during half term? Well here is the result. One of my daughter’s drawings transferred to the front of a T-shirt. How cool is that? She loves it and I have to prise her out of it for purposes of hygiene! Luckily she is at school today, so I’ve been able to wash it.

There’s a little pile of fabric waiting to be ironed and made into hexies. One of you may recognise it. Mentioning no names. More details on that in yesterday’s post.

My children will be rushing through the door at any minute so I’ll be round to visit some desks this evening. You can see them all at Julia’s place.

Tuesday 6 November 2012

Teal Flower Garden Block ~ Preparation

The last time I tried my hand at English paper piecing I was 9 years old. I didn’t know that was what it was called then. My Gran had a set of metal templates and we drew around them onto the backs of old Christmas cards and scraps of fabric.
P1020431

My Gran was a very talented seamstress and she always had a big bag of scraps, left over from the lovely clothes she made for us. I remember cutting some of the hexagons from yellow floral fabric, which had been used to make bridesmaids dresses for my cousins. Well it was the seventies. My Gran showed me how to baste the material onto the paper hexagons and my cousin sewed them together. Eventually it grew big enough to make a cushion. My cousin was staying with us, for a week I think, that Summer and took the patchwork with her when she went home. I wonder if she still has it. I must ask her, when I next speak to her.

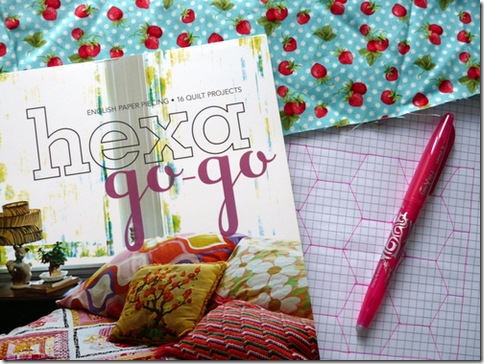
For this project I only need to make a 6” square block, which is a good thing as my hand sewing skills are a bit rusty. I emailed Hadley from Flying Blind On A Rocket Cycle and she had lots of helpful advice. There is a site called Incompetech where you can print out sheets of graph/grid paper, in any design you like, including hexagons of whatever size you need. My block will be made up of 1” hexagons. This measurement refers to the side and gives a shape that is 2” across. I drew a quick sketch in my daughter’s old maths book and I will need 7 whole hexagons for the flower shape and 10 halves to make the block.
P1020433

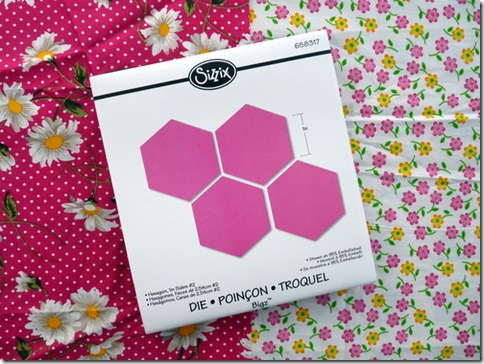
Sizzix have recently launched a range of quilting dies and I decided to get one of those, so that I can cut my hexagons from index cards instead of paper. You could of course print your templates onto lightweight card, but I do not have the best relationship with my printer and thought this was the way to go. Once the paper templates are cut out, the next thing is to cut the fabric and baste that onto the paper hexagons. There are a number of ways to do this. A couple of them are shown here, in this great set of tutorials for a Flower Garden quilt.

There is an alternative, which does not require cutting out the fabric into hexagons at all. You start with a square a little bigger than the paper piece, folding and stitching each edge as you go. It doesn’t look as neat on the back, but I’m feeling quite drawn to this method. There is a detailed tutorial with lovely clear pictures at Kandi Pandi’s Pad or a video tutorial, if you prefer, at Katie’s Quilting Corner.

The fabrics you can see in the photos came from a lovely blog friend. I mentioned that I was hunting for some fabric with tiny strawberries on and she thought she had just the thing in her stash. I love it and I’m really hoping it’s going to work with the teal fabric that Jo has chosen for the quilt. Thank you Jan.

The die arrived this morning, just in time to make an appearance in this post. Great service from Country View Crafts as I only ordered it late on Sunday night. I’ll be cutting my hexagons later and if anyone would like to piece a block along with me, then I’d be more than happy to cut and send you a set. Just let me know.
Sunday 4 November 2012

Storytelling Sunday ~ Mr Sandman

It’s the first Sunday of the month and that can only mean one thing. It’s time for the telling of tales and the sharing of stories and maybe a few pictures to go with them.

SCN_0074

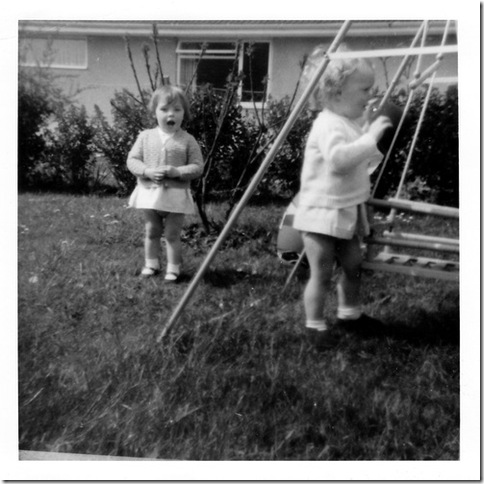
Once upon a time, when I was a very small girl indeed, another little girl lived next door and we played together in our garden almost every day. By the time I started school her family had moved, but we still played together from time to time. We stayed friends into our early teens and then they moved a very long way away.

You might remember I went to 50th anniversary party a couple of weeks ago. That celebration was for the other little girl’s Mum and Dad. We had a lovely evening and it was great to see her again after 30 years. One thing she asked me was, “Did we play with a man that you could push over?” and the answer was, “Yes. Yes we did!”

SCN_0075

I don’t actually remember him at all, but my brother does and says we called him Mr Sandman. I dug through the family photos when we got back home and found these two little gems. I was able to email them to her and I thought I’d share them with you today. I’m the little girl on the left, in case you were wondering.

If it’s a dark and stormy night sort of tale you’re after, then there are plenty to be found at Sian’s place. Mine from last November fits the bill too.

Saturday 3 November 2012

Stampin’ Up Saturday ~ Ornament Keepsakes

I almost forgot it was Saturday today. That’s what happens around here when it’s half term. Luckily I’d already made the card ready to share with you.

P1020430

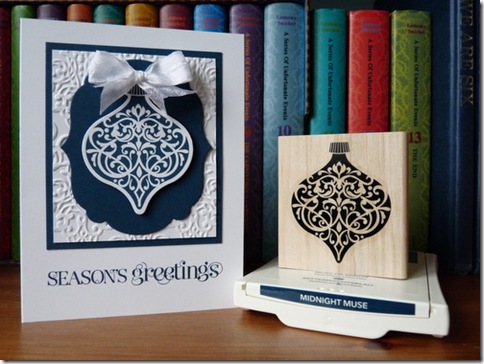
Some people have the perfect knack of layering up different patterned papers when they are making cards, but I am not one of them. I tend to keep my palette simple and my layers to a minimum. This comes in handy when you’re mass producing a design. One colour of ink and the matching cardstock on a white background.

Once I’d finished layering it up I felt it needed a little something, but I wasn’t sure what. Then I remembered these sweet and simple cards that Sian made last year and knew that a seam binding bow would be just the thing. A greeting from my favourite sentiment set and it’s done.

  • Ornament Keepsakes stamp set
  • Holiday Ornaments framelits dies
  • Curly Cute stamp set
  • Midnight Muse ink
  • Whisper White Cardstock
  • Midnight Muse cardstock

I can make ten of these in an hour. I know because I’ve just done it. Not bad eh?

As always please contact me at angelfishcrafts{at}gmail{dot}com if you would like any more information on the products I’ve used here. The online catalogue can be viewed here and if you would like a paper version, I’ll be happy to send you one.

Next week and throughout November I’ll be showing different ways to use this set.