Thursday, 31 July 2014

Summer Scavenger Hunt 2014

I’m joining in with Rinda’s brilliant Photo Scavenger Hunt again this year. It will be my third time. Although it’s been up and running since early June, I chose to save it for the Summer holidays. We’re a week into them now and I’ve taken my first shot.

20140729_142049

20. A bus with a picture painted on its sides.

Strictly speaking (so The Mechanic informs me) this is a coach, but hey, I’ll settle for it.

I do have another, taken before the start of the Summer holidays and I’ve shared it on my blog before, but I just love this shot so forgive me.

IMG_20140707_121053

21. A photograph of you with something representing the season.

Daisies in a Summer meadow lawn.

I’m off the starting blocks with the last two on the list. Although I will be taking another #21, that includes more than my feet! Looking forward to seeing what everyone else has come up with so far.

Monday, 28 July 2014

Coffee and a Catch Up ~ July 2014

If you were popping in for a coffee, this is how you would find Me on Monday. See what I did there? I couldn’t decide whether to join in with Abi or Sian so you’ve got two for the price of one. I’ve been removing the buttons from worn out school shirts this morning, before sending them for recycling. Do you do that?
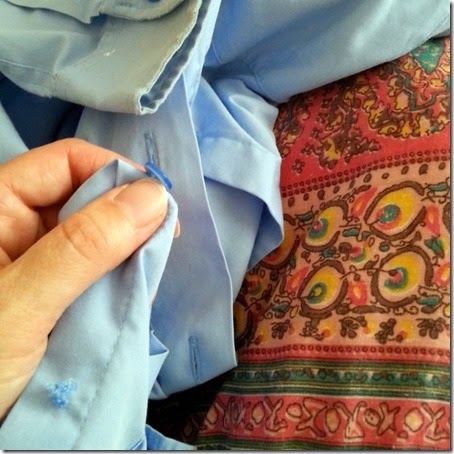
IMG_20140727_163721

It was an old uniform sorting, school work filing, second hand chest of drawers buying, bedroom reorganising, out the front gravelling, shrub trimming, grass cutting, midday heat avoiding, home made 99* eating kind of weekend.

IMG_20140728_075816

A couple more squares have arrived this month, to add to my growing collection, for the Friendship Quilt. Have a look. Aren’t they all beautiful? Each time a new one turns up, I get them all out and try to visualise how I will put them together. There are a lot of blues and greens in there and that will be my starting point I think. Of course I may throw that idea out of the window, once I have the full set! Time will tell. If you’re joining in, and have all or most of your squares, do you have an idea for your quilt top yet? Maybe you’re thinking of turning them into a cushion cover, or some other smaller project, instead. The best bit? I still have more to come.

2014-07-18

I have to tell you about our little adventure a week or so ago. We met up with a National Trust ranger, and a group of other intrepid bug hunters, to go on a glow worm walk. The sun had not quite disappeared at 9.30pm, when we set off, but as darkness descended, on Fontmell Downs, we were rewarded with this amazing sight. With a bit of jiggery pokery, involving a small LED torch and my phone, I managed to capture this one ‘on film’. It was a magical experience and I hope a special memory for the children to look back on one day. Have you ever seen a glow worm**?

IMG_20140728_135447

Thanks for visiting. Now I really must get back to the pile of clothes that I’m dividing up for passing on to a friend, memory quilt making/repurposing and charity shop donating. Some of them are tough choices! Enjoy the rest of your day.

* An ice cream cone with a flake added to it. Traditionally the soft Mr Whippy kind, but we prefer proper dairy ice cream here. It occurs to me, that in explaining 99’s for those uninitiated, I am quite possibly throwing out more terms, which mean nothing to my friends from overseas. Wikipedia is so very handy at times like this.

** You might know them as lightning bugs or fire flies. All varieties of beetles making use of bioluminescence to attract a mate.

Friday, 25 July 2014

Spicy Roasted Chickpeas

I posted a picture of my roasted chickpeas on Instagram the other day and Rinda asked if I would share the recipe. It was one of those make it up as you go along experiments. The oven was already on to cook the dinner and I had time on my hands. I’ve been trying to think up some healthier snacks and this fitted the bill.

IMG_20140723_185157-001

I used tinned chickpeas, which I rinsed well and then placed on a tea towel. I folded the other half of the cloth over the top and rolled them under my hands to dry. That removed any loose skins and I could easily pick them out.

IMG_20140723_190703-001

I put them in a roasting tin, lined with foil, sprayed with olive oil and dusted liberally with smoked paprika and powdered garlic. Followed by a couple of grinds of black pepper and a little sea salt, before placing in the oven at 200 C.

IMG_20140723_194029-001

After about 15 minutes I took them out and gave the tin a good shake to turn the chickpeas. Repeated after another 15 minutes and then removed from the oven after another 15 minutes, by which time they were nice and crisp and delicious. 24 hours on, the few I saved (in an air tight container) had gone soft so they want eating up. They’re very moreish and somehow I don’t think that is going to be an issue!

PS If you were expecting SIPIDI! today, I’ve decided to give it a little break over the Summer. It’ll return in September.

Wednesday, 23 July 2014

What’s On Your Workdesk Wednesday #268

We’re at the kitchen table this afternoon. Surprise!

IMG_20140723_132002

First day of the school holidays and me and my girl have her sewing machine out to see what it can do. She had it for her birthday way back in May, but then exams took over and it didn’t get much of a look in. We’re going to remedy that this week.

IMG_20140723_143052

I sprung for some decent quality watercolour paper for another project we have in mind. That arrived this morning, along with my postcards from Moo. I’ll be writing them this evening, ready to send to my pen pals, as part of Sian’s Pile of Postcards Exchange. I’ve seen a few images popping up on Instagram. That’ll be the ones with the *slightly* unfortunate hash tag #sianspileofpostcardsexchange or is it just me?

Linking up with Julia’s grand tour of desks today, of course. Have a good one.

Monday, 21 July 2014

Monday Randoms

This is what my hands looked like after class last week. I’m still trying to find a way to persuade one or two people that they really don’t need to press the stamp into the inkpad *that* hard! If there is ink on the edge of the rubber, then it’s a little too much pressure. If the whole of the background rubber is awash with ink, then it’s a lot too much pressure. If the entire wood mount is also covered…well…the person cleaning up after you will end up looking like this!

IMG_20140716_131528

It’s quite a difficult thing to teach someone. I can demonstrate my own technique, ‘til I’m blue in the fingers face, but you have to find the right pressure for yourself. I’ve described it as a tapping motion, rather than a pressing one. Suggested building up the colour gradually, by using two or three gentle taps, rather than trying for even coverage in one firmer push. If an inkpad is particularly ‘juicy’ I sometimes just rest the stamp on the surface and that can be enough. You know it’s level and you won’t get that irritating ‘ghosting’ from inky edges. If you’re a stamper, do you have any other handy hints that I could suggest? I want everyone to get the most from their experience and go home with something they are proud of.

woywwsept13

While we’re on the subject of teaching…..I’ve written a few tutorials, to share here on my blog, over the past couple of years. I always use the same format: a photograph of each step, with an explanation underneath. A few people have commented that I should make Youtube videos so I thought I’d ask the question. Is that how you prefer to view tutorials?

I do watch them myself, to get an idea of how to do something. If I was going to follow the directions, I would have to keep stopping and starting the video, while I made my own ‘copy’ of the project. Personally, I prefer to have the directions in a series of images and instructions, that I can have open on my laptop screen, or print out to refer to.

P1030405

I’m going to make a tutorial for the “Card in a Box”, as a few people said they would like one and I have all the “Blue Peter” bits ready to photograph. It will be in my usual style of words and pictures this time, but I might rethink for the future, depending on feedback.

One last thing, before I go. Abi opened a discussion, about replying to blog comments, last week. A couple of people commented that they didn’t know if they were “no-reply” bloggers. I thought I’d direct you to my own post on the subject from last year. It includes a link to instructions for finding out and fixing, if you’d like to.

20140718_221047

Oh, I know I said that was the last thing, but I wanted to share this little teaser. Something that I got very excited about on Friday night. If you’re a Facebook friend you’ll already know, but if you’re not…..can you guess what it is? I’ll tell you the whole story later in the week. Hope you’ve had a great start to yours.

PS Links to the tutorials pictured above can be found here:

Flower Treat Box

Gift Card Holder

Hearts & Doilies

Lollipop Holders

Saturday, 19 July 2014

Christmas in July? Not around here.

One or two of you, clever readers, spotted the Ornament dies on my kitchen table on Wednesday. Not much of a jump to assume I was doing a little seasonal crafting, but no. I needed some balloons to decorate a Card in a Box and was originally planning to use an oval punch. But mine isn’t quite the right shape and I wasn’t happy with them. I thought I’d use circle punches instead…..and then…..

IMG_20140716_161950

I had a brain wave…..Ornament dies! Turned upside down they gave me a ‘neck’ to tie the string around. Perfect. If you’re a regular, you’ll know I like to get plenty of mileage out of my craft supplies. There’s something especially satisfying about alternative uses for Christmas themed products, don’t you think? I stamped the balloons with chevron designs and pulled out my old favourite, Gorgeous Grunge, for the panels. Added a Frame to the front for a sentiment and I was done. I left the largest balloon at the back plain so that the card could be personalised.

IMG_20140716_160442

One of the ladies who comes to my class had requested a Shaker card. I’d never made one before so I watched a few Youtube videos on the construction and then created one in my own style. As you can probably tell, I used what was already out on my desk for the previous card. Not that I’m lazy or anything.

Gorgeous Grunge for that ink splattered look and the wonderful Positively Chevron background stamp. I punched out lots of small circles, from the scraps leftover after die cutting the balloons, and added a pinch of sequins for a bit of sparkle.

Colours used were Pacific Point, Pool Party and Whisper White, with the addition of Daffodil Delight for the Card in a Box. I was thinking of putting together a tutorial for the latter. There are lots online already, I know, but I do mine a little differently so that they fit a standard 6” x 6” (15cm) envelope. If you’d be interested in that, just let me know in the comments.

We’ve had some spectacular storms here, the last couple of nights and I love to watch them, as long as I’m safely tucked up indoors! I’m hoping for a quiet one tonight though. Enjoy the rest of your weekend.

Wednesday, 16 July 2014

What’s On Your Workdesk Wednesday #267

Good morning. Here we are again, taking a tour around the world by craft desk.

P1030525

The usual Tuesday kitting session in progress at the kitchen table. Where else? I took this just before clearing away. The children were due to arrive home from school at any moment. Today we are making one of the ever popular “Card in a Box” designs and a shaker card, which is new to me, but I think I cracked it.

The sun is shining and I’m about to load up my little Clio. Catch you all later, round at Julia’s place. Put the kettle on and I’ll bring the biscuits.

PS If you want see what those bits of fabric, I was cutting last week, turned into, then check out this post.